
Delicious Homemade Peanut Butter
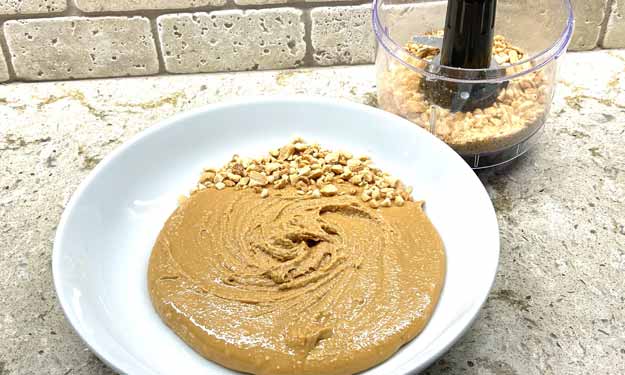
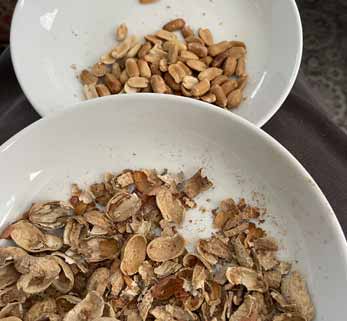
It only takes peanuts and a few minutes to make homemade peanut butter - and once you do, you may never go back to store-bought again. I recently gave it a try one rainy afternoon, and it turned out so good that I had to share. I started with two cups of roasted, shelled peanuts (which I shelled myself) and skipped the salt altogether. The result? Two small jars of creamy and chunky peanut butter that my husband and I can both enjoy - smooth for me, chunky for him.
Ingredients for Homemade Peanut Butter
- 2 cups roasted, shelled peanuts
- Salt (optional) – I didn’t use any because I didn’t realize the peanuts I bought were already salted, and it turned out perfect as-is.
That’s it. Just peanuts - no sugar, no additives, nothing extra.
How I Made My Homemade Peanut Butter
I started out using my Vitamix, but since I only had about two cups of peanuts, it wasn’t quite enough for the blades to grab everything properly, even using the tamper. So, I transferred the mixture to my food processor - and that’s where I finished it off using short pulses so I didn't overheat my little go-getter.
Instructions for Homemade Peanut Butter
- Add 2 cups of roasted peanuts to the Vitamix.
- Blend on high for about 2 to 3 minutes, using the tamper to push the peanuts down while blending. Pause as needed to scrape the sides.
At this point, I switched to my food processor. After a few minutes in the Vitamix (even with tamping), it just wasn’t enough peanuts to blend completely. Since I wanted both chunky and creamy peanut butter, I split the mixture in half.
- Transfer half of the peanut mixture to the food processor. Process in 30-second increments (so you can check consistency) until the peanuts release their natural oils and turn creamy.
- Remove the creamy peanut butter and transfer it to a glass jar.
- Add the other half, process in the same way but when it’s almost to the consistency you want, add in the pre-pulsed peanuts for the chunky texture, pulse a few times to mix, then transfer to another glass jar.
Before I started making the peanut butter, I pulsed a few peanuts separately for the chunky batch my husband likes. Those two cups of peanuts made just enough for us to enjoy some fresh, homemade peanut butter - for a few days (maybe).
Notes and Tips
- Blender vs. Food Processor: If I were making a larger batch, the high-powered Vitamix would work great from start to finish. But for smaller amounts, I’m going to try and use the food processor the whole way next time - hopefully it won't overheat.
- For Chunky Peanut Butter: Pulse a few peanuts first and set them aside, then add them back in and pulse once or twice to mix through.
- No Oil Needed: Roasted peanuts have enough natural oil to create a smooth texture - no need to add any.
- Storage: I store mine in small glass jars with lids. It keeps well for several weeks at room temperature or even longer in the fridge - though ours rarely lasts that long.
Why Is My Homemade Peanut Butter “Sticky”
I actually prefer a thicker peanut butter, so the texture doesn’t bother me at all - but not everyone likes it - and honestly it's really only "sticky" when eaten alone - put it on toast or a rice cake and it's perfect (to me anyway). The neighbor’s daughter stopped by the other day while I was making a peanut butter smoothie, and she asked to try a spoonful. The look on her face almost made me burst out laughing. I said, “It tastes good, but it’s a little sticky, isn’t it?” She just nodded while trying to work her way through it. She did like the flavor though.
Homemade peanut butter can turn out a little sticky for a few common (and totally normal) reasons. Here’s what typically causes it - and how to fix it next time if you want a smoother, creamier texture:
The Peanuts Didn’t Process Long Enough
Peanut butter goes through several stages: crumbs - thick paste - doughy ball – then the smooth and creamy texture. If you stop during the “dough ball” stage, the texture can feel sticky or tacky.
How to Fix:
Just keep processing longer. The natural oils continue to release the more it runs, which makes it creamier. If you have a small food processor like I do, use short bursts so you don't overheat it.
Roasted Peanuts Equals a Thicker Texture
Dry-roasted peanuts (especially store brand) sometimes have less natural oil than others. That can make your peanut butter richer but also stickier.
How to Fix:
Add 1 to 2 teaspoons of neutral oil if you want it silkier. Use an oil like: peanut, avocado, or even a light olive oil will work.
Smaller Batches Don’t Blend as Smoothly
I read somewhere that using a small amount of peanuts can cause small batches (like I made) to be slightly thicker and stickier.
I think the homemade peanut butter I made turned out sticky because I didn’t give it enough time for the peanuts to release all the oils? I like it this way but we’ll see with the next batch and a different brand of peanuts.
In the End, Making Homemade Peanut Butter Was Totally Worth It!
Homemade peanut butter isn’t just easy - it’s rewarding. You skip the extra sugars, oils, and preservatives that sneak into many store-bought jars, and you control everything from texture to taste. Plus, there’s something satisfying about knowing exactly what’s in your jar - just peanuts, a little patience, and a lot of flavor.
Once you make homemade peanut butter, you’ll see how simple and fun it can be - a perfect little project for a rainy afternoon and a delicious reward afterward.

Recipe Card
Yummy Homemade Peanut Butter

Servings: 2 Small Jars
Total Time: Not Long
Ingredients
- 2 cups roasted, shelled peanuts
- Salt (optional) – I didn’t use any because I didn’t realize the peanuts I bought were already salted, and it turned out perfect as-is.
Instructions
- Add 2 cups of roasted peanuts to the Vitamix.
- Blend on high for about 2 to 3 minutes, using the tamper to push the peanuts down while blending. Pause as needed to scrape the sides.
- Transfer half of the peanut mixture to the food processor. Process in 30-second increments (so you can check consistency) until the peanuts release their natural oils and turn creamy.
- Remove the creamy peanut butter and transfer it to a glass jar.
- Add the other half, process in the same way but when it’s almost to the consistency you want, add in the pre-pulsed peanuts for the chunky texture, pulse a few times to mix, then transfer to another glass jar.
Optional
Before I started making the peanut butter, I pulsed a few peanuts separately for the chunky batch my husband likes.
Notes
1. Blender vs. Food Processor: If I were making a larger batch, the high-powered Vitamix would work great from start to finish. But for smaller amounts, I’m going to try and use the food processor the whole way next time - hopefully it won't overheat.
2. For Chunky Peanut Butter: Pulse a few peanuts first and set them aside, then add them back in and pulse once or twice to mix through.
3. No Oil Needed: Roasted peanuts have enough natural oil to create a smooth texture - no need to add any.
4. Storage: I store mine in small glass jars with lids. It keeps well for several weeks at room temperature or even longer in the fridge - though ours rarely lasts that long.
Why Is the Peanut Butter Sticky?
Peanut butter goes through several stages: crumbs - thick paste - doughy ball – then the smooth and creamy texture. If you stop during the “dough ball” stage, the texture can feel sticky or tacky.
How to Fix:
Just keep processing longer. The natural oils continue to release the more it runs, which makes it creamier. If you have a small food processor like I do, use short bursts so you don't overheat it.
Dry-roasted peanuts (especially store brand) sometimes have less natural oil than others. That can make your peanut butter richer but also stickier.
How to Fix:
Add 1 to 2 teaspoons of neutral oil if you want it silkier. Use an oil like: peanut, avocado, or even a light olive oil will work.